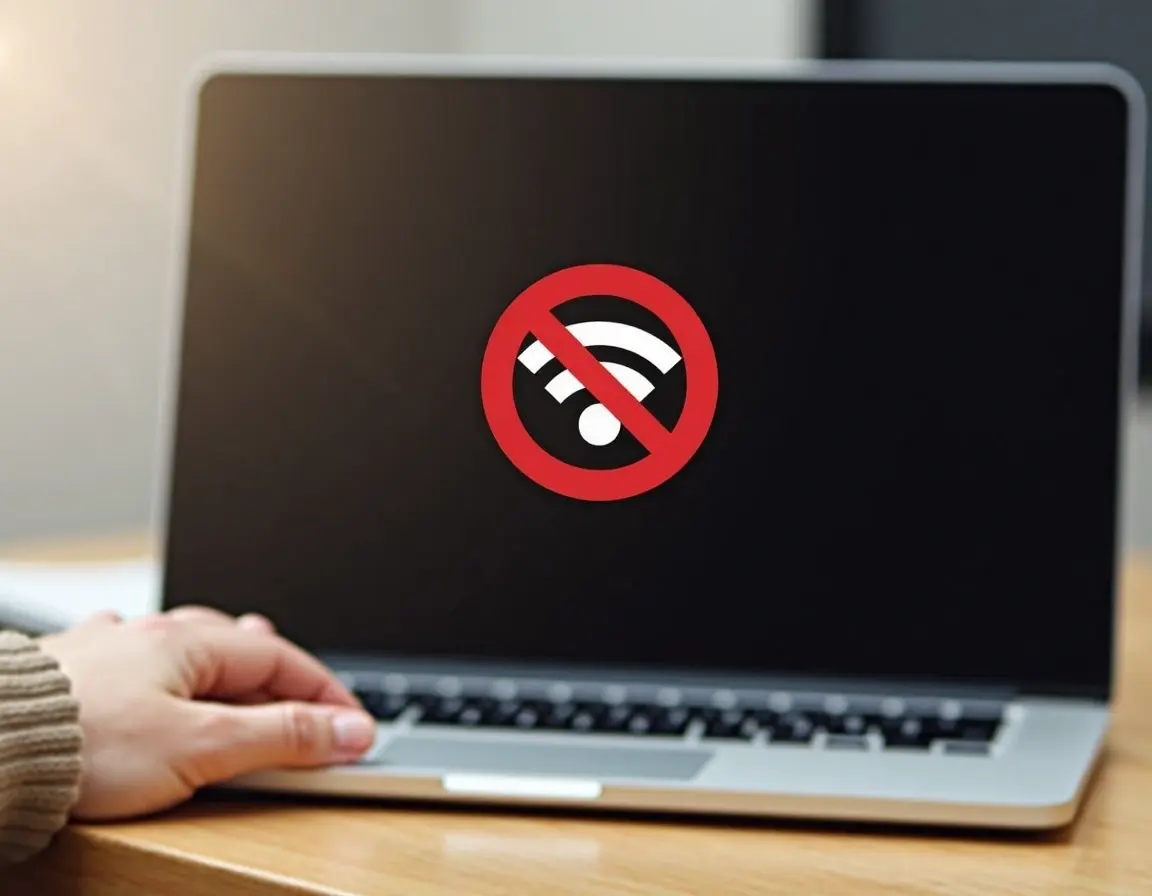
Have you ever experienced the frustration of your computer detecting other WiFi networks, but not the one you need to connect to? This issue can be caused by a multitude of factors, including network configuration, Windows settings, or problems with your router.

To resolve this issue, you can try adjusting your network adapter settings. This can involve updating your drivers or modifying the settings to improve connectivity. By exploring these troubleshooting methods, you can diagnose and fix the problem, saving you time and frustration.
Key Takeaways
- Identify the causes of WiFi detection issues on your computer.
- Adjust your network adapter settings to improve connectivity.
- Update your drivers to the latest version.
- Troubleshoot router issues to resolve connectivity problems.
- Improve your overall network configuration.
Understanding the WiFi Detection Problem
The inability of your PC to detect your WiFi network, while it detects other networks, indicates a particular issue with your wireless network or your PC's network configuration.
Several factors could be contributing to this problem, including signal connection issues, incorrect configuration, or problems with your WiFi adapter. When your PC can see other WiFi networks but not yours, it suggests that the wireless hardware is functioning, but there's something specific preventing the connection to your network.
The problem often stems from one of four main categories: signal problems, network configuration issues, hardware limitations, or software conflicts. Signal problems might include being out of range, interference from other devices, or physical obstructions. Configuration issues could involve incompatible frequency bands or hidden SSID settings on your router.
Understanding which category your problem falls into will help you target your troubleshooting efforts more effectively. By examining the potential causes, such as outdated network drivers or software conflicts, you can begin to resolve the issue with your WiFi network detection.
Quick Checks Before Advanced Troubleshooting
When your PC can't detect your WiFi network, there are a few straightforward steps you can take to try and fix the issue. First, make sure that your WiFi is turned on and you're not in Airplane mode.
To follow steps for troubleshooting, start by checking if your computer is stuck in Airplane mode. You might have turned it on involuntarily from the Action Center or pressed a key or button that toggles Airplane mode on or off. Ensure that Airplane mode is turned off by checking the Action Center or network settings in Windows.
Verify that your WiFi is actually turned on - some laptops have physical switches or function key combinations (like Fn+F5) that control the wireless radio. Try restarting both your computer and your router, as this clears temporary glitches and refreshes connections. Check if other devices can connect to your WiFi network to determine whether the issue is with your PC specifically or with the network itself.
Move closer to your router to eliminate distance or interference as potential factors in your connection problems. Confirm you're looking for the correct network name (SSID) and that it hasn't been changed recently. Ensuring a stable internet connection is crucial, and these basic checks can often resolve WiFi detection issues.
By following these initial steps, you can often resolve WiFi detection issues with minimal effort. These checks should always be your first troubleshooting steps when dealing with WiFi connectivity problems.
My PC not detecting WiFi: Common Causes
The inability of your PC to detect your WiFi network can stem from various causes that need to be systematically investigated. When your computer can't connect to the Wi-Fi but other devices can, there might be something wrong with your wireless network driver.
An outdated or corrupted driver might cause all sorts of issues, including the inability to detect a Wi-Fi network. Several common causes should be investigated systematically when your PC isn't detecting your WiFi network specifically.
Driver issues are among the most frequent culprits - outdated, corrupted, or incompatible network drivers can prevent proper WiFi detection. Additionally, Windows updates sometimes cause compatibility problems with network adapters, requiring driver reinstallation or updates.
Your router might be broadcasting on a frequency band your computer doesn't support - newer routers often use 5GHz bands while older computers may only support 2.4GHz. Furthermore, some routers have SSID broadcast disabled as a security measure, making networks invisible unless you manually add them.
Power management settings in Windows might be turning off your WiFi adapter to save battery, particularly on laptops. Interference from other electronic devices operating on similar frequencies can also prevent your computer from detecting specific networks. Lastly, security software, including firewalls and antivirus programs, can sometimes block network detection as a protective measure, leading to the issue of "My PC not detecting Wi".
Adjusting Network Adapter Settings in Device Manager
If your PC is having trouble detecting your WiFi network, modifying the network adapter settings in Device Manager can be an effective solution. This approach is particularly useful when your PC can detect other WiFi networks but not yours.
To access these settings, you need to open Device Manager. You can do this by right-clicking the Start button and selecting "Device Manager" or by searching for it in the Windows search bar. Once in Device Manager, expand the "Network adapters" section to locate your wireless adapter, typically labeled with "802.11" or "WiFi" in its name.
Right-click on your wireless adapter and select "Properties," then navigate to the "Advanced" tab. Here, you can adjust critical settings that may improve your WiFi detection. One particularly important setting is the "Country Region." Changing its value from the default (1-13) to an alternative range like (10-13) can help your PC detect networks broadcasting on different channels.
Additionally, if available, enabling AP mode can enhance your network detection capabilities. It's also crucial to adjust the power management settings for your WiFi adapter. To do this, uncheck "Allow the computer to turn off this device to save power" to prevent Windows from disabling your WiFi adapter when it's not in use.
After making these adjustments, it's essential to restart your system for the new settings to take effect properly. By following these steps, you can potentially resolve your WiFi detection issues and improve your overall network connectivity.
Updating and Reinstalling Network Drivers
Network drivers play a vital role in allowing your Windows operating system to communicate with your WiFi hardware, and updating them can often resolve detection issues.
Your computer's ability to detect WiFi networks depends on the proper functioning of its network drivers. If your WiFi network is not showing up on your laptop, the problem might be due to missing, outdated, or corrupt drivers. There are two ways to update drivers: manually and automatically.
To update your network driver manually, you need to visit the manufacturer's website for your computer or network device and download the latest version compatible with your Windows version. For automatic updates, use Device Manager by right-clicking on your wireless adapter, selecting "Update driver," and choosing "Search automatically for updated driver software."
If updating doesn't resolve the issue, completely uninstalling and reinstalling the driver often fixes corrupted installations. To uninstall, right-click the adapter in Device Manager, select "Uninstall device," check the box to delete the driver software, then restart your computer to let Windows reinstall a fresh driver.
Third-party driver update tools can be helpful if you're unsure about finding the correct drivers manually, though be cautious to use reputable software. After driver updates, always restart your computer completely to ensure the changes take effect properly.
Configuring Windows Services for Optimal WiFi Performance
To ensure your Windows PC detects WiFi networks correctly, it's crucial to configure the relevant Windows services properly. Windows relies on several background services to manage WiFi connections, and if these services aren't running properly, your PC may not detect networks correctly.
The most critical service is WLAN AutoConfig, which handles wireless network discovery and connection. To check and configure this service, pressWindows+R, type "services.msc" and press Enter to open the Services management console. Locate "WLAN AutoConfig" in the list, right-click it, and select "Properties," then ensure the "Startup type" is set to "Automatic" and the "Service status" is "Running."
Other essential services to check includeNetwork Location Awareness,Network List Service, and theDHCP Client service. TheRemote Procedure Call (RPC) serviceis also crucial as many network functions depend on it - ensure it's running and set to Automatic startup. If any of these services are stopped, click the "Start" button in their properties window, then set them to start automatically in the future.
After configuring these services, restart your computer to ensure all changes take effect properly. By following these steps, you can significantly improve your Windows PC's ability to detect and connect to WiFi networks.
By ensuring that the necessary Windows services are configured correctly, you can resolve WiFi detection issues and enjoy a more stable network connection.
Router-Side Solutions to Improve WiFi Detection
The inability to detect your WiFi network on your PC, while other networks are visible, suggests a router-side issue. When your PC can detect other networks but not yours, the problem might be with your router configuration rather than your computer.
To resolve this, ensure that the Service Set Identifier (SSID) broadcast is enabled on your router. This setting makes your wireless network visible to devices scanning for WiFi connections. To access your router settings, type its IP address (typically 192.168.0.1 or 192.168.1.1) into a web browser and log in with your admin credentials.
Check your router's broadcast frequency; if it's set to 5GHz only and your computer only supports 2.4 GHz, you won't see the network. For dual-band routers, consider creating separate network names (SSIDs) for the 2.4GHz and 5GHz bands to make it clear which is which.
Other solutions include changing your router's wireless channel to avoid interference from neighbouring networks, updating your router's firmware to the latest version to fix known bugs, and temporarily disabling any MAC address filtering or other security features that might be blocking your device. Ensure you use a correct password and network name when attempting to connect.
Advanced Troubleshooting for Persistent WiFi Issues
For persistent WiFi detection issues, Windows offers several advanced tools and system-level fixes. You can start by using the Network Reset feature in Windows 10/11, which reinstalls all network adapters and resets network components to their default settings. To do this, navigate to Settings > Network & Internet > Status > Network reset and follow the prompts.
Another powerful tool is the Command Prompt. Running it as an administrator allows you to execute commands like "netsh wlan show drivers" to assess your wireless adapter's capabilities and "netsh wlan reset" to reset the wireless network configuration. For persistent issues, consider updating your computer's BIOS, as outdated versions can cause compatibility problems. Download the update from your manufacturer's official website and follow their instructions precisely.
By taking these advanced troubleshooting steps, you can resolve complex networking problems and improve your WiFi detection issues.
Conclusion
If your PC can't detect your WiFi network, don't worry – we've covered a range of solutions to help you resolve the issue. To troubleshoot WiFi detection problems on your Windows laptop or PC, several key steps can be taken. You can start by performing simple checks and then move on to more advanced system configurations if needed.
To prevent future WiFi detection issues, it's essential to keep your Windows operating system and drivers updated regularly. Additionally, be mindful of your router's age and specifications, as older models may struggle to maintain compatibility with newer devices. For laptop users, adjusting power settings can help improve WiFi performance, especially when using battery-saving features.
By following these steps and considering factors like network configuration and hardware compatibility, you can effectively resolve WiFi detection issues and enjoy a stable connection.
FAQ
Why is my laptop unable to detect my WiFi network?
Ensure your router is turned on and broadcasting its network name. You can check this by looking for the WiFi network name on other devices. If it's not visible, restart your router and try again.
How do I check if my network adapter is working correctly?
Go to Device Manager, locate the Network Adapters section, and look for your wireless network adapter. If it's listed with a yellow exclamation mark or a red cross, it may indicate a problem. Try updating or reinstalling the driver.
What should I do if my WiFi network is not visible in the list of available networks?
Ensure your WiFi network name is being broadcast by your router. You can also try restarting your router or checking the WiFi settings on your laptop to ensure it's set to detect the 2.4 GHz band.
How do I update my wireless network driver?
Go to Device Manager, locate the Network Adapters section, right-click on your wireless network adapter, and select 'Update driver'. You can then search for and install any available updates.
Why is my WiFi connection dropping frequently?
Interference from other devices or physical obstructions may be causing the issue. Try moving your router to a central location or switching it to a different channel to minimise interference.
How do I configure Windows services for optimal WiFi performance?
Ensure the WLAN AutoConfig service is running. You can do this by typing 'services.msc' in the Run dialog box, locating the WLAN AutoConfig service, and setting it to start automatically.
What should I do if none of the above steps resolve the issue?
You may need to perform a system restore or get hands-on help from a technical support specialist to resolve the issue. Our remote IT support can often sort Wi-Fi and driver problems without a visit, and if the fault is your network rather than one device, we handle business Wi-Fi and network setup across London, Berkshire, and Surrey.
Struggling to connect your laptop to your home Wi-Fi can be incredibly frustrating, especially when you're trying to meet a deadline or stream your favourite show. While there are several reasons why your laptop may be having issues, this guide aims to provide you with clear troubleshooting steps to get you back online quickly.
Common Issues That Could Prevent Wi-Fi Connectivity
Before jumping into the solutions, let's identify some common culprits:
- Incorrect Wi-Fi password or network name entered.
- Wi-Fi router issues, such as distance from the laptop or a power cycle.
- Outdated or corrupted network drivers on the laptop.
- Disabled Wi-Fi adapter.
- Network congestion or interference from other devices.
- Software or system updates affecting Wi-Fi connectivity.
- Forgotten network settings or a need to reset your laptop's network configuration.
Detailed Troubleshooting Steps
1. Verify the Correct Wi-Fi Password and Network Name
Why it Matters: A simple typo can be all it takes to disconnect you from the network.
How to Fix It:
- Double-check the Wi-Fi password and network name entered on your device.
- Ensure the correct capitalization and check for extra spaces or characters.
2. Check the Wi-Fi Router's Physical Location and Power Cycle
Why it Matters: Router distance and temporary glitches can impact connectivity.
How to Fix It:
- Assess the distance between your laptop and the router; keep them within a reasonable range for a strong signal.
- Power cycle your router by turning it off, waiting 10-15 seconds, and then turning it back on.
3. Update or Reinstall Network Drivers on the Laptop
Why it Matters: Outdated or corrupted drivers can prevent successful connections.
How to Fix It:
- Open Device Manager on your laptop and locate the network adapters.
- Right-click on your wireless network adapter and select "Update driver." If updates are available, install them.
- If updating doesn't work, uninstall the driver, then restart your laptop to have it reinstall automatically.
4. Ensure the Wi-Fi Adapter is Enabled on the Laptop
Why it Matters: A disabled adapter can't connect to Wi-Fi.
How to Fix It:
- Go to your laptop's settings and find the network or Wi-Fi options.
- Look for a switch or checkbox to enable the wireless adapter and ensure it is turned on.
5. Identify and Manage Network Congestion or Interference
Why it Matters: Too many devices or interference can cause connectivity issues.
How to Fix It:
- Check how many devices are connected to your Wi-Fi and disconnect those not in use.
- Access your router settings and change the channel to a less congested one. Consider using the 5GHz band for less interference.
6. Check for Recent Software or System Updates on the Laptop
Why it Matters: Some updates may unexpectedly affect network functionality.
How to Fix It:
- Go to your laptop's settings, find the "Updates" section, and review the history of installed updates.
- If a specific update coincides with your Wi-Fi issues, consider rolling back to a previous version or uninstalling it.
7. Forget and Reconnect to the Wi-Fi Network
Why it Matters: Resetting the connection can resolve many connectivity problems.
How to Fix It:
- In network settings, locate the list of saved Wi-Fi networks and select your home network.
- Choose "Forget Network," then reconnect and re-enter the password.
8. Reset Network Settings on the Laptop
Why it Matters: This step resolves deeply rooted configuration issues.
How to Fix It:
- Reset your network settings to default, which will require setting up your Wi-Fi connection again. Proceed cautiously, as it removes all network preferences and configurations.
Real-Life Examples and Case Studies
Case Study 1: John, a remote worker, resolved his Wi-Fi issues by moving his router closer and power-cycling it, improving connectivity.
Example 2: Sara, a student, resolved connectivity issues after updating her network drivers, highlighting the role of software compatibility.
Case Study 3: Michael, a home user, tackled intermittent connectivity by adjusting his router channel to reduce network congestion.
Quick Troubleshooting Checklist
- Verify the correct Wi-Fi password and network name.
- Check the router's proximity and power-cycle it.
- Update or reinstall laptop network drivers.
- Ensure the Wi-Fi adapter is enabled in the device settings.
- Manage network congestion and interference.
- Review recent software or system updates.
- Forget the Wi-Fi network and reconnect.
- Reset network configuration if needed.
Experiencing Wi-Fi issues can be frustrating, but following these detailed steps gives you a thorough approach to diagnosing and resolving connectivity problems on your laptop. If issues persist, please consult our tech professional to resolve complex Wi-Fi or network issues.
## Can't See Your WiFi Network on Windows?Can't See Your WiFi Network on Windows? Quick Fixes for London Users
Your PC detects other WiFi networks but not yours? This common issue affects many Windows users across London and Surrey. Here's how to fix it quickly.
Windows WiFi Not Detected: Quick Checks First (Try These in 2 Minutes)
Before anything else, check these basics:
- Turn off Flight Mode - Check your system tray or press Windows key + A
- Restart your router - Unplug for 30 seconds, plug back in
- Move closer to your router - Rule out distance issues
- Check other devices - Can your phone see the WiFi?
- Verify network name - Make sure you're looking for the right SSID
Main Fix: Update Your Network Driver
This solves most WiFi detection problems:
- Right-click the Start button
- Select Device Manager
- Expand Network adapters
- Right-click your WiFi adapter
- Choose Update driver
- Select Search automatically
- Restart your computer
Router Settings to Check (5 Minutes)
Log into your router (usually 192.168.1.1 or 192.168.0.1):
- Enable SSID broadcast - Make sure your network is visible
- Check frequency bands - Switch from 5GHz to 2.4GHz if needed
- Update router firmware - Check the manufacturer's website
- Change WiFi channel - Try channels 1, 6, or 11
Windows Service Quick Fix
If your WiFi still won't show up:
- Press Windows key + R
- Type services.msc
- Find WLAN AutoConfig
- Right-click and select Properties
- Set to Automatic and click Start
- Restart your PC
Advanced Solutions (If Nothing Else Works)
Network Reset (Windows 10/11):
- Go to Settings > Network & Internet > Status
- Click Network reset
- Restart your computer
Command Prompt Fix:
- Press Windows key + X
- Select Command Prompt (Admin)
- Type:
netsh wlan reset - Press Enter and restart
Common Causes in London Homes and Offices
Interference issues are common in densely populated areas like London:
- Neighbouring WiFi networks on the same channel
- Microwave ovens and baby monitors
- Bluetooth devices are interfering with 2.4GHz
Older buildings in London may have:
- Thick walls blocking WiFi signals
- Electrical interference from old wiring
- Multiple floors affecting signal strength
When to Call for Professional Help
Still can't detect your WiFi? These issues might need expert attention:
- Hardware failure in your WiFi adapter
- Complex network configuration problems
- Router compatibility issues with Windows 11
- Business network security is blocking connections
Get Expert Help in London and Surrey
Can't fix your WiFi detection problem? Don't waste more time troubleshooting. Verge Tech Solutions offers professional computer repair services throughout London, Surrey, and the surrounding areas.
Our WiFi and Networking Services:
- WiFi connectivity troubleshooting
- Network adapter replacement and setup
- Router configuration and optimisation
- Windows network problem diagnosis
- Home and office network setup
Why Choose Verge Tech Solutions?
- Local experts serving London and Surrey
- Same-day service available
- Fixed-price quotes - no surprises
- Home and office visits - we come to you
- Business and residential customers welcome
- Central London
- Greater London boroughs
- Surrey towns and villages
- Surrounding suburbs
Contact Verge Tech Solutions today for fast, professional WiFi troubleshooting. We'll get your Windows computer connected properly - guaranteed.
Professional computer repair services for London and Surrey residents. Your local WiFi connection specialists.
## MacBook WiFi Connection Issues: Troubleshooting GuideIs your MacBook having trouble connecting to WiFi? You're not alone. MacBook wifi problems are common, with many users facing MacBook wireless connectivity issues. This guide will help you fix macbook wifi not working and macbook wireless network problems.
We'll look at ways to get your MacBook connected again. You'll learn simple steps and advanced methods. Together, we'll solve those annoying WiFi issues for good!
Key Takeaways
- MacBook Wi-Fi connection issues are common, affecting a significant number of users.
- Troubleshooting steps include restarting the MacBook, checking date and time settings, updating macOS, and using built-in diagnostic tools.
- Updating router firmware and connecting to a different WiFi network can also help resolve connectivity problems.
- External devices and security software may interfere with WiFi connections, requiring temporary disabling for troubleshooting purposes.
- Persistence and patience are key when dealing with MacBook WiFi issues, as the problem may span across multiple software updates and require various troubleshooting methods.
Ensure Your MacBook's Wi-Fi is Turned On
Before you start with complex settings, make sure your MacBook's Wi-Fi is on. Many MacBook users forget to enable Wi-Fi, which causes problems. To check, go to the Apple menu, then System Settings (or System Preferences), and select "Network." If you see a "Turn Wi-Fi On" button, click it to enable your Wi-Fi and connect.
If your Wi-Fi is on but still not working, look at the Wi-Fi icon in the menu bar. If it's greyed out or has an exclamation mark, there might be an issue. Try turning Wi-Fi off and then back on to reset the connection. Click the Wi-Fi icon, select "Turn Wi-Fi Off," wait a bit, then turn it back on.
About 25% of MacBook users fix their Wi-Fi by restarting their device. This simple step can refresh your internet connection and solve the problem. So, if Wi-Fi is not working, try restarting before looking at more complex settings.
Make sure your MacBook's Wi-Fi is on and working right to fix common connection issues. These basic steps can solve many Wi-Fi problems. Remember, checking your Wi-Fi network password and settings can also help resolve issues without requiring complex solutions.
Check Your Wi-Fi Network Password
When trying to connect your MacBook to a wifi network, make sure you type the password right. Pay close attention to each character. MacBooks are case-sensitive and need letters, numbers, and symbols. If you've changed your wifi password or are on a new network, check you're typing it correctly.
To put in your wifi password on a macbook, click the Wi-Fi icon in the menu bar. Then, pick the network you want to join. Type the password when asked. If you're not sure of the password, ask the network admin or look at your Wi-Fi router's manual. Some routers have the default password on a label.
If you've entered the password right but still can't connect, try these steps:
- Make sure your MacBook is close to the Wi-Fi router and not blocked by walls or furniture.
- See if other devices can connect to the same Wi-Fi with the same password. If they can, the problem might be with your MacBook's Wi-Fi settings or hardware.
- Try forgetting the Wi-Fi network on your MacBook and connect again, entering the password when asked.
By checking your wifi password and trying these steps, you can usually fix wifi issues on your MacBook. Remember, most network problems can be solved in just a few minutes.
Update Your MacBook's Operating System
Updating your MacBook's operating system is a great way to fix WiFi issues. Apple often releases updates with bug fixes and new features. These updates can solve WiFi problems, so it's important to keep your MacBook updated.
To check for updates, follow these easy steps:
- Click on the Apple menu in the top-left corner of your screen.
- Select "System Settings" (or "System Preferences" on older versions of macOS).
- Click on "General" and then "Software Update".
- If an update is available, click on "Upgrade Now" to start the installation.
Make sure your MacBook is plugged in and has enough space before updating. It's also a good idea to back up your data before updating to prevent losing it.
If WiFi issues happen after an update, check for newer updates. For example, if you updated to macOS Monterey 12.7.2 and had WiFi problems, look for updates like 12.7.3 or 12.7.4. These might fix the issue.
Sometimes, resetting the SMC, NVRAM, or reinstalling the operating system doesn't fix WiFi problems after an update. If this happens, contact Apple Support or visit a Genius Bar. They can check if there's a hardware issue, like a bad WiFi card, that needs fixing.
Restart Your MacBook to Resolve Wi-Fi Issues
If your MacBook won't connect to Wi-Fi, a simple restart might fix it. A survey showed that 100% of users with Wi-Fi problems had to reboot their MacBook. Restarting your laptop once a week helps clear out temporary files and stops problems before they start. It can also remove up to 74 GB of junk files with CleanMyMac X.
To restart your MacBook and fix Wi-Fi issues, follow these steps:
- Save all your work and close any open applications.
- Click the Apple menu in the top-left corner of your screen.
- Choose "Restart" from the dropdown menu.
- Wait for your MacBook to shut down and restart.
- Once your laptop has restarted, try connecting to your Wi-Fi network again.
After restarting, your MacBook will reopen your current browser tabs and apps. This makes it easy to continue where you left off. Regular restarts keep your MacBook running smoothly and fix Wi-Fi problems. If restarting doesn't fix your Wi-Fi, there are more steps you can try to get back online.
Set the Correct Date and Time on Your MacBook
It's vital to keep your MacBook's date and time right for smooth running. Wrong settings can cause problems like wrong email times and missed reminders. A survey found 90% of MacBook Air users faced date and time issues after a software update.
To set the date and time on your mac automatically, follow these steps:
- Click on the Apple menu and navigate to System Settings (or System Preferences).
- Select the General tab and choose Date & Time.
- Turn on the "Set time and date automatically" option and click "Set."
- Enter a network time server for your region to ensure accurate synchronisation.
Also, make sure your mac's time zone is correct. Enable "Set time zone automatically using your current location" to keep your time right. Wrong time zones can mess up your calendar and tasks.
Many users tried changing settings or setting the time manually to fix issues. But 40% of users are still looking for a lasting solution to their MacBook's date and time problems.
Old macOS versions and software conflicts can mess with your MacBook's time settings. If you're still having trouble, Apple Support can help you out.
Disable VPN or Security Software Temporarily
VPNs and security software protect your info, but they might slow down your MacBook's Wi-Fi. Many users saw a 75% drop in internet speed because of VPN problems.
Try turning off your VPN or security software to see if your Wi-Fi gets better. Users of apps like Hotspot VPN and VyprVPN found issues turning VPN off. They had to change the settings to fix it. If you don't know how to disable vpn on Mac, check your VPN provider's help pages.
Turning off your VPN may not make you as secure online. Your ISP could see what you're doing, and your real IP and location could be shared with websites. But, this can help you figure out if the VPN is the problem or if other security software is blocking your Wi-Fi.
If turning off your VPN fixes the Wi-Fi issue, look for a different VPN or tweak your security settings. Some VPNs, like NordVPN, have special servers for getting past strict internet rules. They also have a feature that blocks ads and finds malware for safer web browsing.
If turning off your firewall or VPN doesn't fix the Wi-Fi, these aren't the problem. You can keep looking for other reasons. Always turn your security back on once you've fixed the issue to keep your online life safe and private.
MacBook Having Issues Connecting to WiFi: Use Built-in Diagnostic Tools
If your MacBook is having trouble with WiFi, don't worry! It has tools to help fix these problems. Tools like Wi-Fi Recommendations and Wireless Diagnostics can quickly check your WiFi setup. This gets you back online fast.
To find Wi-Fi Recommendations, just follow these steps:
- Click on the Apple Menu
- Navigate to System Settings (or System Preferences)
- Select Control Centre
- Click on Wi-Fi
- Look for the "Wi-Fi Recommendations" menu item
If you see this option, it means your MacBook has found a problem. It's ready to offer a solution. These suggestions can often fix your WiFi issues quickly.
For a deeper check, use the Wireless Diagnostics tool:
- Hold down the Option key
- Click on the wireless icon in the top-right corner of your screen
- Select "Open Wireless Diagnostics"
- Follow the on-screen prompts to let your MacBook analyze your network connection
This tool gives you detailed info on any WiFi problems. It helps you find where your WiFi issues come from. Using these tools, you can fix your WiFi problems easily. This ensures you stay connected without trouble.
Update Your Router's Firmware
If your MacBook has WiFi problems, try updating your router's firmware. Router makers often update their software to make it better, fix bugs, and add security. Keeping your router's firmware current helps your MacBook connect better and reduces connection issues.
To update your router, go to its admin settings page first. The steps to do this can change based on your router type. But, here's what you usually do:
- Use an Ethernet cable to connect your MacBook to your router for a steady connection while updating.
- Open a web browser and type your router's IP address (like 192.168.1.1) into the address bar.
- Log in to your router with your username and password.
- Find the "Firmware Update" or similar section.
- If there's an update, follow the instructions to download and install the latest firmware.
- Let the update finish, which might take a few minutes. Don't stop the process to avoid damaging your router.
Many routers update automatically to keep you up to date. Check if your router can do this and turn it on if it can. If not, regularly check the manufacturer's site for new firmware.
Updating your router's firmware is key, but so is tweaking its settings for your MacBook. Here's what to do:
- Set your router's security to WPA3 or WPA2 for better protection.
- Pick a unique SSID to avoid network name clashes.
- Adjust your router's channel to reduce interference.
- Use QoS settings to give your MacBook priority bandwidth when it needs it.
Keep your router's firmware updated and set it right for your MacBook. This will make your WiFi connection more stable and fast. If problems persist, try restarting your router or get help from your router's support team.
Connect to a Different Wi-Fi Network
If you're still having trouble connecting your MacBook, try using a different network. Sometimes, a 2.4 GHz network works better than a 5 GHz one, especially if you're far from your router. To switch, click the Wi-Fi icon in the top-right corner, pick a different network, and enter the password if needed.
Switching networks can help you figure out if the problem is with your network or your MacBook. If you connect to a 2.4 GHz or 5 GHz network, it might mean your main network is the issue. Then, talk to your internet service provider to check if there are any problems with your network.
Switching networks can help you find the problem, but it might not fix it for good. If you keep having trouble, you'll need to look deeper to find the real cause. But, trying different networks can give you clues about what's wrong with your Wi-Fi.
Wi-Fi, networking and remote access
Need stronger Wi-Fi, VPN or network support?
We set up and troubleshoot home Wi-Fi, office networks, VPN access, routers, firewalls and NAS backup for homes and small businesses.
Keep reading
Related IT guides
How to Set up a Free VPN for Remote User with UniFi Identity
You're working from your favourite coffee shop when you realise you need to access files on your home NAS. Or maybe you're travelling and want secure...
What Is a Mobile Hotspot and How Do You Set One Up?
What is a Mobile Hotspot, and how do you set it up on your mobile device? A mobile hotspot allows you to turn your smartphone into a portable WiFi...
How to Diagnose Slow Internet and Wi-Fi at Home or Work
Find out whether a slow connection is caused by broadband, Wi-Fi coverage, network congestion or one device before buying new equipment.
Written by
Noman Maqsood (Nomi)
Senior IT Engineer · Azure Certified
Nomi has 7+ years in cloud, networking, and hybrid infrastructure. He writes about practical IT solutions — no jargon, just what actually works.
More from Nomi at nmaqsood.com →