Time's ticking! With Windows 10 support ending on October 14, 2025, you might be wondering whether to splash out on a new computer or upgrade your current one to Windows 11. We've helped countless Home and Business users make this transition, and I'm here to tell you that upgrading to Windows 11 doesn't have to cost a penny. In this guide, I'll walk you through everything you need to know about making the switch.
The End of Windows 10: What You Need to Know
Let's get one thing straight - your computer won't suddenly stop working in October 2025. However, Microsoft will cease providing security updates and technical support for Windows 10, leaving your system vulnerable to new security threats. For home users, this is concerning. For businesses, it's critical. It's essential for users to stay informed about the Windows 10 support timeline details to plan their next steps effectively. While the operating system may continue to function, lacking security updates can expose both personal data and business information to significant risks. Thus, moving to a newer operating system or implementing robust security measures becomes increasingly vital to ensure the safety and integrity of your digital environment.
System Requirements: Can Your PC Run Windows 11?
Before we learn about the upgrade process, let's check if your computer is up to the task. Here are the basic requirements:
Windows 11 Minimum Requirements
- Processor: 8th Gen Intel Core or newer (2017+)
- RAM: 4GB minimum (8GB recommended)
- Storage: 64GB or larger
- System firmware: UEFI, Secure Boot capable
- TPM: Trusted Platform Module 2.0
- Graphics: DirectX 12 compatible with WDDM 2.0 driver
How to Check Your PC's Compatibility
1. Download Microsoft's PC Health Check app
2. Run the application
3. Click "Check Now"
4. View detailed results
What is TPM 2.0 and Why Does it Matter?
TPM (Trusted Platform Module) is a security chip that helps protect your system from tampering. Think of it as a security guard for your PC's most sensitive data. Most computers built after 2017 include TPM 2.0, but I'll show you a workaround later if yours doesn't.
Step-by-Step Upgrade Guide
Before You Start:
1. Back up your important files
2. Make sure Windows 10 is up to date
3. Free up at least 10GB of storage space
4. Connect to a stable internet connection
The Upgrade Process:
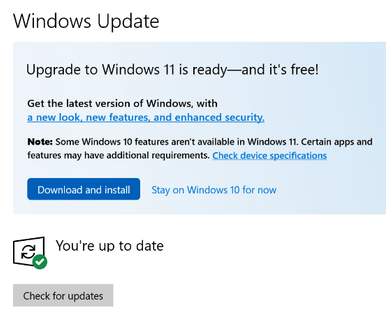
1. Go to Settings > Update & Security
2. Click "Windows Update"
3. Look for "Upgrade to Windows 11"
4. Follow the installation wizard
What If Your PC Isn't "Officially" Compatible?
Don't worry - I've got you covered. There are legitimate ways to install Windows 11 on "unsupported" hardware:
Method 1 upgrading to Windows 11: Registry Edit (Advanced Users)
Modifying the registry can be risky. Always back up your registry before making changes. We cannot be held responsible for any issues that might arise from these modifications.
Step-by-Step Registry Edit:
- Press Windows key + R to open Run
- Type "regedit" and press Enter
- Navigate to: HKEY_LOCAL_MACHINE\SYSTEM\Setup\MoSetup
- Right-click in the right pane
- Select New > DWORD (32-bit) Value
- Name it exactly: "AllowUpgradesWithUnsupportedTPMOrCPU"
- Double-click the new value
- Set Value data to "1"
- Click OK and close Registry Editor
- Restart your PC
After completing these steps, you can rerun the Windows 11 installation. You'll see a warning about installing on unsupported hardware - click "Accept" to continue.
Method 2: Installation Media Method (Using Rufus)
This method creates modified Windows 11 installation media that bypass the system requirements.
What You'll Need:
- A USB drive (8GB or larger)
- Rufus software
- Windows 11 ISO file
- About 30 minutes of time
Step-by-Step Guide to run Rufus:
- Download Required Files:
- Get Rufus from rufus.ie
- Download Windows 11 ISO from Microsoft's website
- Prepare Your USB:
- Insert your USB drive
- Back up any important files (it will be formatted)
- Create Modified Installation Media:
- Open Rufus
- Select your USB drive from the "Device" dropdown
- Click "SELECT" and choose your Windows 11 ISO
- Under "Image option" select "Extended Windows 11 Installation"
- Look for "Remove requirements" section
- Tick boxes for: □ Remove TPM 2.0 requirement □ Remove Secure Boot requirement □ Remove RAM requirement
- Click "START"
- Install Windows 11:
- Restart your PC
- Boot from USB drive (usually by pressing F12 or Del during startup)
- Follow the installation wizard
- Choose "Custom Install" for a clean installation
Important points to remember:
- Method 1 is better for upgrading while keeping your files
- Method 2 requires a clean installation (will wipe your drive)
- Both methods may affect future Windows updates
- Microsoft doesn't officially support either method
- Some features like Windows Hello might not work properly
Pro tips before upgrading your windows:
- Create a full system backup before trying either method
- Document your current Windows settings
- Keep your product key handy
- Have your drivers ready to reinstall
- Plan for 1-2 hours of installation time
Remember: These methods are unofficial workarounds. While they work, they may:
- Compromise system security
- Affect system stability
- Impact future updates
- Void your warranty
I've used both methods successfully, but I recommend upgrading your hardware if possible, especially for business use. These methods should be considered temporary solutions or last resort for testing purposes.
Frequently Asked Questions
Is Windows 11 Better Than Windows 10?
In my experience, Windows 11 offers better performance for newer hardware, improved security features, and a more modern interface. However, the difference isn't dramatic enough to justify buying a new PC solely for the upgrade.
What Happens If I Don't Upgrade?
You can continue using Windows 10 after October 2025, but you'll be more vulnerable to security threats. I recommend upgrading before the deadline to ensure your system stays protected.
Common Installation Issues and Solutions: Upgrading from Windows to Windows 11
- Error messages and their solutions
- Common compatibility issues
- Post-installation tips
Pro Tips From My Experience:
- Run the upgrade during off-hours
- Keep your power connected throughout
- Have your Windows password handy
- Be patient - the process can take 1-2 hours
Final Thoughts
Upgrading to Windows 11 doesn't have to be complicated or expensive. Whether you're using a supported device or need to use one of the workarounds, you can make the transition before the 2025 deadline. Remember to back up your data and follow the steps carefully.
Need Help upgrading your Windows 11?
Don't wait until the last minute—check your PC's compatibility today and start planning your upgrade to Windows 11. Please contact our Support Team if you're unsure or feel overwhelmed by any part of the upgrade process. We'll be happy to help you smoothly transition to Windows 11.
Windows troubleshooting and repair
Need Windows fixed without losing your data?
We repair Windows startup loops, update failures, driver problems, blue screens and slow PCs remotely or on-site across London, Berkshire and Surrey.
Keep reading
Related IT guides
How to Use the winget Upgrade Command on Windows 11
I’ve been using Windows for years, and one thing I’ve learned is that keeping apps updated is non-negotiable . Outdated software is like leaving your...
Fixing No Sound Issues in Windows 11: Your Ultimate Troubleshooting Guide
If you’re struggling with no sound on your Windows 11 computer, you’re not alone. Many users face this frustrating issue, but the good news is that...
How to Terminate a Running Process Windows 11
Have you ever been in a situation where you needed to terminate a running process but didn't know how to do it in Windows 11? Perhaps, your computer...
Written by
Noman Maqsood (Nomi)
Senior IT Engineer · Azure certified
Nomi has 7+ years in cloud, networking, and hybrid infrastructure. He writes about practical IT solutions — no jargon, just what actually works.
More from Nomi at nmaqsood.com →